Monday, November 14, 2011

Let there be light - Fuses and Relays


Hi All,

Another battle with the Prince of Darkness, the fuse box and lights / horn switching is one of the common failure points on the MG electrical system.
The fuse holder is weak and the clips corrode and loose tension and the large consumers (lights / horns / fan / wipers) are directly switch which is hard on the old switch gear.

Long time on list has been an upgrade, this means a change with more fused circuits, better fuses and relay switching for large consumers means brighter louder.
The common recommendation on the MG experience is to fit a Bits4Brits kit :-
   http://www.bits4brits.net/
So I got a parcel yesterday so out with the wire cutters last night.

This is what came.

Fuse box

Headlight / horn relay kit.

The old fuse box location.

Box itself.

Off.

See the state of the fuse box, most of these spades moved, let alone the corrosion.

Fairly simple plug and play.

All done !


Next the relay kit, sits adjacent to the horn.
A worrying rats nest of wires.

Yes, chock blocks and insulation tape, not a good sign but at least not just twisted together.

Bit more figuring out on this one, including the DPO bodge on the headlights which I fixed.

Also took me some time to figure out the horn was powered, not earth switched.

Got it all in and looks nice.


And proof !


I highly recomend these kits, great way to upgrade your wiring ! 

As always comments, questions and any other abuse welcome.

Cheers,
Richard B.


Next . . . . . Voltage stabiliser and then maybe re-wrap the loom to tidy up the wiring. 


Next onto the relay

Thursday, October 27, 2011

Family Job - Bonnet Insulation

Hi All,

Time to replace the bonnet insulation, however, to do this best to remove the bonnet.
Handy timing my Dad was over from the UK so perfect for the two man job.

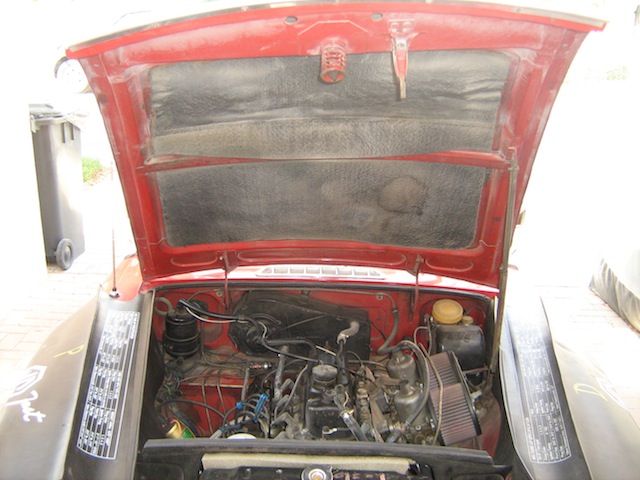
This is the poor state of the old lining, original sisal type material, falling off and generally cr4ppy.

Bonnet off, careful placement of wing guard and some cardboard.

Peel off the old stuff, and give it a scrap, extra help from the youngest daughter Bess.
Is one year to young to start working on cars ? NO !

Give it all a wash to get the dust off.
Me getting wet and my Dad supervising.

Going to use spray glue so mask it all off
Unlike when this was originally done, blindfolded perhaps ?

All looks good.

Fit the bonnet back, try, adjust, try, adjust, try, adjust etc..
All went back nicely in the end.
It is square, honest, the bonnet only has one stay so looks lop sided.

Cheers,
Richard B.

Next . . . . . . . Rear diff seal, electrics or engine bay clean. Depends on parts and motivation I think.

Tuesday, October 18, 2011

That Seals It !

Hi All,
Long time job that needed doing was the rear gear box seal, last night was the time.
It is a splined shaft with a flange bolted to the drive shaft sealed with a spring backed lip seal in the gearbox.

This is normally done with the engine gearbox out of the car BUT with the right tools is possible in situ.
So out with the toy boxes and up on to the jack stands.
This is where we want to get.


It has been suggested that you can just lift the shaft up at the front but I had to remove it completely. (After chiselling some witness marks.)

This is the flange, talking about right tools this is where you need one.
Need a big impact gun to bust the 1-5/16" nut off, its 150 ft/lbs torque.
By hand is a pain, no access and you can turn the engine with an impact rattle rattle and its undone.

Flange off.

Not to bad, a visible groove but nothing I could feel.

As this part is one of the few not available I was planning to sleeve it and had a SKF Speedi-Sleeve standing by.

Hmm, damn !
I had taken a chance on the size from some dimensions off MGE but they were for an overdrive.
I got 1.685-1.691" but the actual size is 1.561-1.567".

Anyway 5 minutes with some 800 wet and dry and came up okay.

This is the seal it self.


Once it was out the lip is gone and the seal generally FTFF.

But getting the seal out is another "problem".
It has been recommended to use a proper seal hook but the seal was in so firm the metal shield broke.


This is were having the right tool for the job came in again.
I know that these seals can be a pain so I had got my self a toy I wanted for a long time a slide hammer. (This is now my new favourite tool.)
Put the screw attachment in the end, drive a screw into the seal, bash bash and straight out !


Farily straight forward now, fit the new seal with a smear of RTV, oil the flange sealing area, pop it back in.
Torque it up, bent the tab locker and refit the drive shaft front.

And rear end.

Re-connect the handbrake, re-fill with oil (including some PTF on the threads this time).

Job done, hope this stops the leaks.

Cheers,
Richard B.

Next . . . . . . . Bonnet heat shield, with my Dad :-)